
Felting is an ancient technique that probably originated within nomadic cultures in Central Asia more than 2500 years ago. It is still made in that area today in many of the traditional forms, such as rugs, household items, clothing and even houses (yurts or ghers, as they are known in Asia and Mongolia). We can surmise that originally, fleece was probably put in shoes or under saddles to protect skin of feet and animals from chafing. Eventually more uses were found for the resulting matted fibers, especially because they provided warmth and protection —- against elements and even enemies. Traditionally women used the fleece from sheep, yak or even camels, which was cleaned, layered and then rolled back and forth to force the wool fibers to interconnect. Embellishment using natural and later manmade dyes, stitching, quilting and the addition of materials such as cords and metal beads turned utilitarian objects into works of art.
Felt is created by wool fibers that tangle together to create a dense fabric. The fibers themselves are covered with a series of scales which overlap the length of the fiber. When heated with warm water, the scales open up. If the fibers are then rolled or pounded, they interlock and create a dense mat.
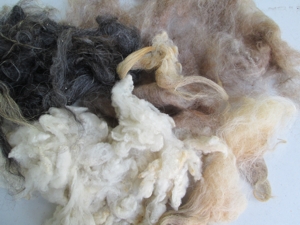
There is a wide variety of sheep and the fleece from each variety has unique characteristics. Some felt very easily, whiles others do not. It is important to make a sample and felt it before beginning a large project.
1. Preparing the fleecea. Washing: Beginning with fleece freshly shorn from a sheep, first wash it in warm soapy water to remove the debris and lanolin. Do not rub or agitate the fleece at this point and carefully spread it out to dry.
b. Picking: When the fleece is completely dry, pick out any remaining debris and fluff it up.
c. Carding: It is important to card or comb the fleece so that the fibers are all lying in the same direction. You can use hand carders or a drum carder. This process is like combing tangled hair. You may have to card/comb the fleece several times to insure the fibers are lined in one direction.
2. Wet Felting
a. Lay the fibers on a netting in a thin mat. Then play a second layer of fibers on top of the first layer, so that the rivers are perpendicular. Continue layering the fibers to a desired depth.
b. Cover the fleece mat with another piece of netting and play on a larger piece of bubble wrap. Gently wet the bundle with warm soapy water.
c. When all the fleece is wet through, carefully roll the bundle around a swimming pool “noodle” and roll gently at first, checking to make sure the fleece mat is the desired shape.
d. Gradually increase the pressure on the roll and continue this process, rolling from various sides, until the fibers remain bonded when the netting is removed.
e. Remove the netting and continue rubbing the felted piece vigorously until the object holds its shape. This step is called “fulling”.
f. Rinse the soap from the felted piece and let it dry.
3. Dry Felting
a. Roll a ball or shape a mat of fleece on a foam pad.
b. Use a felting needle (a long thin barbed needle) to poke the fleece repeatedly. The barbs will force the fibers to mingle and tangle with each other, eventually forming a solid piece.
c. Keep adding layers of fleece until the desired shape or design is created.
d. If desired, you can wrap the final product in a net and rub with warm soapy water, just to insure the fleece is sufficiently felted.

